|
|
|
|
|
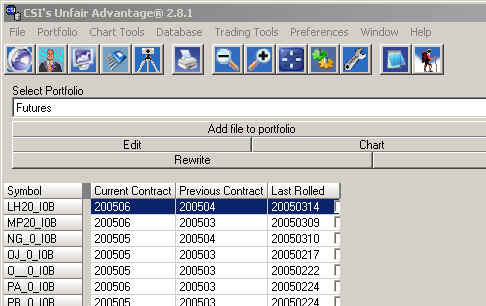
There are two steps in this process: 1) Add the new instrument to the UA "Futures" portfolio 2) Add the new instrument to the Trading Blox™ Futures Dictionary ---------------------------------------------- Step I First open UA, select the "Futures" portfolio, and press "Add file to portfolio"
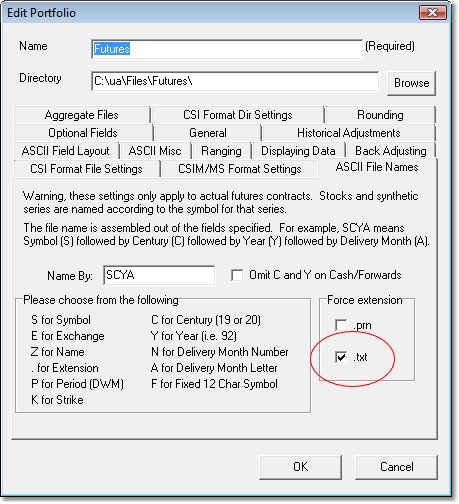
This will bring up a "Selecting Data Series" window that allows you to select new markets to add to this portfolio. Select the Market Type of "Futures," press the "Back Adjusted" tab so that the file will use the backadjusting we defined for the rest of the porfolio, and press the Mkts button to select from a list. Alternately you could just enter DA into the box and hit return. Or a string of markets like DA,W,C etc. You don't need to modify any other information on this page. But double check to make sure it's similar because some versions of CSI UA don't bring this up correctly. The important part is that the File Format is ASCII and if you click on Preferences you see that the file is Comma Delimited and with a force .txt extension.
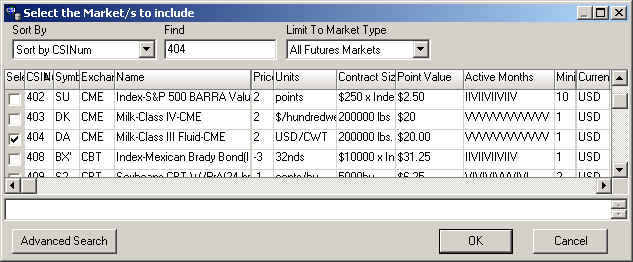
When we press the "Mkts" button, we get the following screen that allows us to select the market we wish to add to the portfolio. In this case we are adding Milk (DA). You can check the "Select" box next to the market to add.
When we are back at the "Selecting Data Series" window press OK. We will get a message asking if we want to build these files, we press Yes.
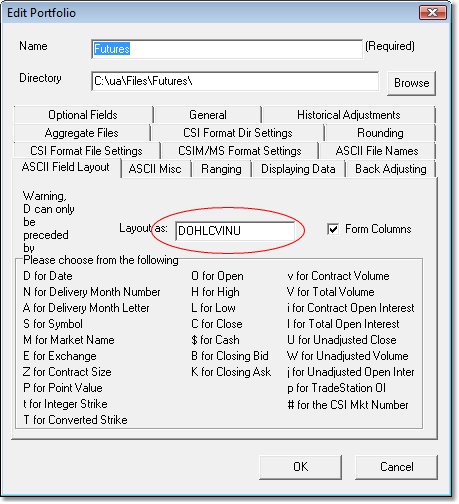
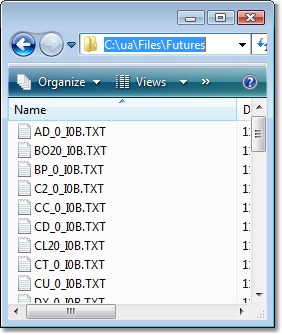
Once we are back in the main UA screen, the instrument has been added to the portfolio, and the file has been built. This instrument will be updated daily, and we can now access this data from Trading Blox™. To check that this file was created successfully, go to the UA/Files/Futures folder, and find the file staring with DA. It should be something like DA followed by some characters and ending in .txt. Also, if you open this file you should see the data in the format D,O,H,L,C,V,OI,DM,UC comma delimited with no header. Here is what the folder should look like, with a list of .txt files:
If you open a file, like AD, then you should see the format is correct like this:
Step II Now we can start Trading Blox™ and access the Edit/Edit Futures Dictionary menu item. This will bring up a list of all the futures instruments Trading Blox™ is aware of, and the associated contract details. Press the "Add Market" button to add a new market. Press the Synch UA button to get the market data from CSI UA. Be sure to double check this data as it is not always 100% accurate. You will want to fill in the Margin as well, so get that from the exchange. All this data needs to be checked periodically and is the reponsibility of the user. The exchange can change symbols, minimum ticks, big point values, margins, etc with very little notice. Press the Find Symbol button to locate the file name (based on the symbol) and the folder location. Note that the find process finds files starting with the symbol name, so in the case of C you may find CC or CT first, so just hit the button again. If your file name does not start with the symbol, then enter the first few letters of the file name to find it, then change the symbol back to the correct symbol. We can now press OK. The instrument has been added to our Futures Dictionary. The last step is to add the instrument to one of our portfolios, so it will be used for testing. Use the Edit/Edit Portfolios menu option. In this case we are using the Demo portfolio for testing, so we are going to add Milk to that porfolio. Simply select the Portfolio to use (Demo), and check the checkbox next to the instrument to add (Milk).
Press Ok and return to the main Trading Blox™ screen. Now when you use the Demo portfolio, Milk will be included as an instrument to use for the test. There are some additional trouble shooting recommendations on the bottom of the FAQ page.
|
|
|
|
|